
Amazon Wedding Registry
Sign up for an Amazon Account

Before creating a registry on Amazon, you need an account. While an Amazon Prime account isn’t required to create a wedding registry, if you don’t yet have it, you should see if you qualify for a free Amazon Prime account.
How to Get Amazon Prime for Free
Sign up for an Amazon Prime AccountCreate a registry

- Go to the Amazon Wedding page, and click Create Your Registry.
- Sign in, if required
- At this point, you’ll be guided through a form to describe your wedding. I won’t list each step here because it’s fairly self-explanatory, and the form is likely to change subtly over time.
- Once you’ve completed all of the steps, click Create your registry. Now you’ve got a registry, and you can start adding products!
Tips
Public vs. private registry
During the creation process, you’ll be able to choose whether you want to create a public or private registry. Obviously, you’ll need to set the registry to public in order for guests to see it, but you might want to set it to private while you’re building it. Then when you’re satisfied, you can change privacy settings in the Settings page.
The Settings page offers three privacy options:
- Anyone can see the registry (public)
- Only people with the link can see it
- Only registrants (you and your spouse-to-be)
Also, if you’re using The Knot for wedding planning, you can choose to make your registry searchable on The Knot’s website.
Manage your registry
Add gifts to your registry
If there’s one thing Amazon is good at, it’s showing you products you’re likely to want. When you click Get started, you’re taken to a page with recommended products, and there’s even a Gift Advisor that will help you plan. You can easily add recommended products from this page.
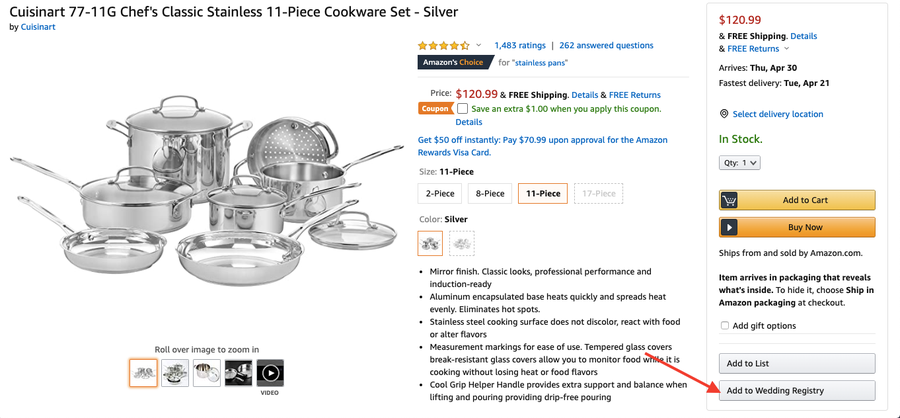
However, you’ll likely want to search for specific products. You can also use the search bar to find products and add them from the product page. Go through the same steps that you would if you’re buying a product, but instead of clicking Add to Cart or Buy Now on the product page, click Add to Wedding Registry below.
View your registry
At any time, if you want to view all of the products in your registry, you can click on the Account dropdown and select Wedding Registry under the Your Lists section. This will take you back to the “Gift Advisor”, and you can click “Your Registry” to see the products in your registry.
Delete items in your registry
From the Your Registry page, find the product you want to remove and click Edit Item. Then click Remove Item.
Share your registry with family and friends
From the “Gift Advisor “ or “Your Registry” page mentioned in the previous step, click “Share” in the top menu. This will take you to a page with sharing options.
Share the registry URL
On this page you’ll find your registry URL. This is a URL that can be sent to friends and family via email, text, or can be included on the invitation.
Change your registry URL
You might notice that the registry URL is long and unattractive. You’ll probably want to change your registry URL to something a little “cuter” 🙂 To do so, click “Change My Link” next to the URL. This will give you the opportunity to use something shorter, easier to read, and easier to share. This is especially important if you’re going to include the URL in a written invitation.
Delete your registry
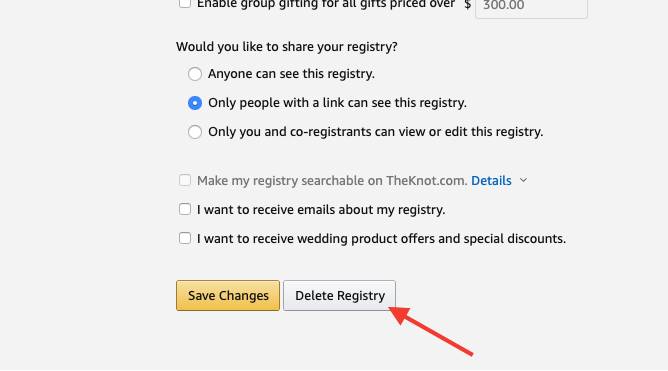
At some point, you’ll likely want to delete your registry. To do so, you can click “Settings” from the registry page. On this page, you’ll find a number of configurable registry settings, and at the bottom you’ll find a button that says “Delete Registry”.
Click the button, then confirm. Your registry is history!