How To Install Magic Mirror On Your Raspberry Pi
Install Raspberry Pi OS

First, you’ll need to install the latest version of Raspberry Pi OS (formerly Raspbian), the official Raspberry Pi operating system (based on Debian Linux). Check out our guide for Raspberry Pi OS installation instructions.
How to Install Raspberry Pi OS on Your Raspberry Pi
Get the new official Raspberry Pi OS on your Pi.
Boot up your Pi
Unmount the SD card from your computer and insert it into your Pi. Connect your keyboard, mouse, HDMI cable and, lastly, the Pi’s power cable. You will now see the Raspberry Pi OS desktop (GUI).
Connect to your wireless network
Our Magic Mirror needs to be wifi-enabled so that it can connect to the internet and so that we can access it remotely to set things up.
In the top right of your screen, click on the network icon (two computers with an X). Select your network, enter your wifi password, and click OK.
The Raspberry Pi 3 and Raspberry Pi Zero W have built-in wifi, older Pis (and the normal Pi Zero) do not. If you’re using a Pi without built-in wifi, you’ll need to connect a wifi dongle to your Raspberry Pi.
Find your Pi’s IP
We’ll need our Pi’s IP so that we can connect to it from our regular computer and complete the rest of the installation from there.
On your Pi, navigate to Menu > Accessories > Terminal. Type the following and press enter:
ifconfigYour Pi’s IP will be located next to inet addr.
Alternatively, you can also ping your Pi from your computer to obtain the IP address; I wrote a short guide on pinging the Raspberry Pi.
Connect to your Pi from your computer
On newer versions of Raspberry Pi OS, SSH is disabled by default. You can either enable SSH using the SD card or, on your Pi, navigate to Preferences > Raspberry Pi Configuration > Interfaces and enable it there.
How to Enable SSH on Raspberry Pi OS Without a Screen
The SSH protocol is disabled by default.
After enabling SSH, open Terminal (Mac) or Command Prompt (Windows). Type the following command and press enter:
ssh pi@your-pis-ip-addressWhen prompted for your password, use the default Raspberry Pi password: raspberry. If you see an authenticity of host warning, type yes and press enter.
Configure Raspberry Pi OS
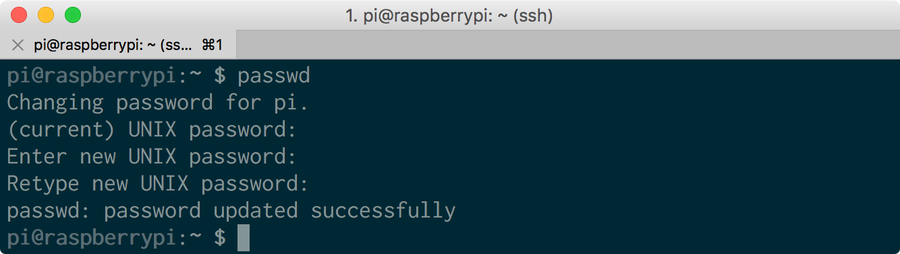
Change the default password For better security, I recommend you change you Pi’s default password to something else. Type the following, press enter, and follow the prompts:
How to Change the Raspberry Pi Password
passwdExpand your Pi’s filesystem to utilize all available space, and also to boot into the GUI Type the following and press enter:
sudo raspi-configSelect Expand Filesystem and press enter. Then, reboot your Pi:
sudo rebootUpdate your Pi
sudo apt-get update
sudo apt-get upgrade --yesInstall the interface
There are a number of great Magic Mirror dashboards available — I went with one created by Michael Teeuw since it’s beautiful and he’s a bit of a Magic Mirror pioneer. More information for the MagicMirror dashboard can be found on its Github repo.
We’re going to use the automatic installer to save us some time. To do this, run the following command:
bash -c "$(curl -sL https://raw.githubusercontent.com/sdetweil/MagicMirror_scripts/master/raspberry.sh)"Note: The automatic installer officially supports the Pi 2, 3, and 4. If you want to run MagicMirror on a Pi 1 or Pi Zero, you’ll need to use the server-only version and install a full-screen browser manually. Save yourself some time and just use a Pi 3. 🙂
When prompted whether you want to use pm2 for auto starting of your MagicMirror, select “yes” by typing y and pressing enter.
MagicMirror should start automatically! If it doesn’t, run:
cd ~/MagicMirror && DISPLAY=:0 npm startStart MagicMirror on system boot
Now we’ll tell MagicMirror to start on system boot. While connected to your Pi, run the following command:
pm2 startupThat command will output another command for you to run. Run that command. It may vary for your system, but for me it was:
sudo env PATH=$PATH:/usr/bin /usr/lib/node_modules/pm2/bin/pm2 startup systemd -u pi --hp /home/piNext, create a startup shell script:
cd ~
nano mm.sh
Add the following to that file, save, and exit:
cd ~/MagicMirror
DISPLAY=:0 npm start
Make sure the script is executable:
chmod +x mm.shNext, start MagicMirror and force it to start on boot:
pm2 start mm.shFinally, reboot your Pi:
sudo rebootChange magic mirror orientation
If your magic mirror needs to be in portrait mode (as mine is), you’ll need to rotate your Raspberry Pi display:
How to Rotate Raspberry Pi Screen or Display (and Touchscreen) Output
Screen upside down? No problem.
sudo nano /boot/config.txtAdd the following lines:
# rotate the screen
display_rotate=1 # use lcd_rotate=3 to rotate in the other directionKeep your Pi screen from sleeping
To keep your Pi from going into sleep mode (which defeats the purpose of the magic mirror), run the following:
sudo nano ~/.config/lxsession/LXDE-pi/autostartAdd the following, save, exit, and reboot:
@xset s 0 0
@xset s noblank
@xset s noexpose
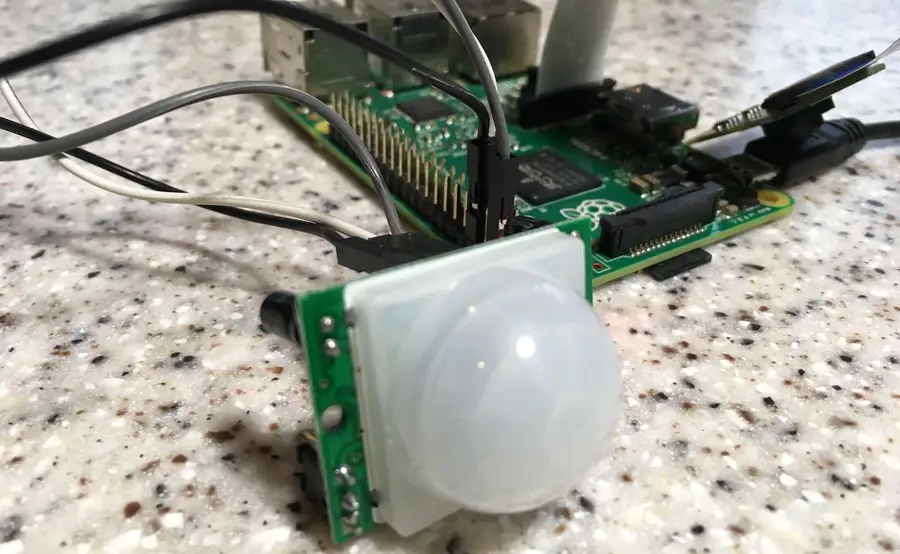
@xset dpms 0 0 0If you’d like to save electricity, you can also add a PIR sensor to your Raspberry Pi and install the MagicMirror PIR module to wake your mirror when it senses motion. 🙂
Customize the interface
Time to configure the interface for your location and needs!
cd ~/MagicMirror
nano config/config.js
Configure weather Change both the “currentweather” and “weatherforecast” weather module settings to your location.
Change the JavaScript config object to add your city’s name, location ID, and free OpenWeatherMap API key:
config: {
    location: "Tampa",
    locationID: "4174757",
    appid: "YOUR_OPENWEATHER_API_KEY",
    units: "imperial" // Use Fahrenheit instead of Celsius
}
Configure compliments MagicMirror spins through an array of complements based on the time of day. If you’d like, you can change these compliments to something different — famous quotes, perhaps?
Configure your calendar By default, MagicMirror shows a calendar containing US holidays. You can change these by pasting a calendar’s public URL here.
For now, I decided to remove both and instead subscribe to the Tampa Bay Rays schedule and a Google Calendar containing a list of national holidays. These calendar URLs normally end in .ics, and you can Google the one you’re looking for.
Down the road, I’ll add authentication so I can link up my Google Calendar. You can also change the icon that’s loaded by changing the value of calendar.urls.symbol; this value should be from the list of FontAwesome icons found here, with the “fa-” portion removed. For example, ‘fa-bullhorn’ becomes just ‘bullhorn’.
When you’re finished configuring, save and exit.
Explore other modules
There are tons of other fun and useful MagicMirror modules you can play around with. Find a really great one? Post in the comments section below and I’ll include it here!
Back up your SD card (optional)
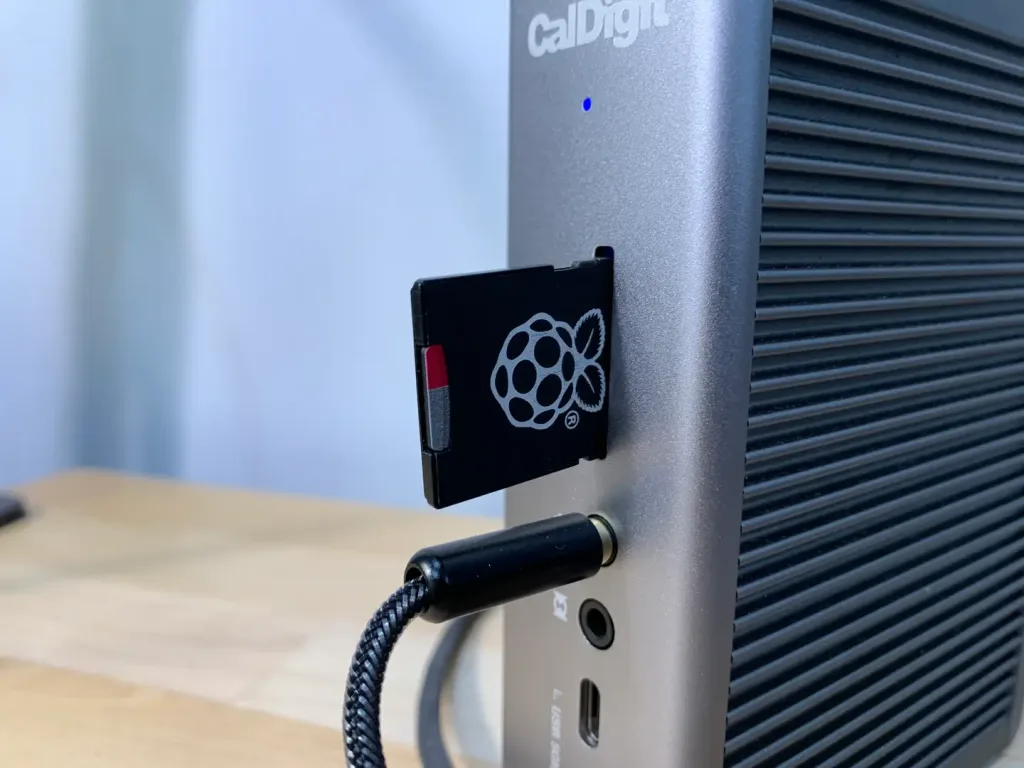
Now that your MagicMirror setup is working, I highly recommend you create a backup of your SD card image. This is totally optional, but if something gets messed up when installing Jasper it will be easy to revert. I wrote a guide on how to back up your SD card for Mac or, if you have Windows, Lifehacker wrote a great guide as well.
How to Back Up and Restore Your Raspberry Pi SD Card on Mac
Easily backup, restore, or clone your SD card!
Optional: Install Google Home
Make your magic mirror voice-enabled by installing Google Assistant. Be sure to check out my Google Home-enabled magic mirror guide to learn how to do this.
Build Your Own Google Home-Enabled Smart Mirror in About Two Hours
Magic mirror, on the wall, turn off the lights.
Optional: Install Jasper
Jasper is an open-source text-to-speech and speech-to-text processing platform, allowing you to speak commands to your Raspberry Pi such as to play a Spotify playlist, add things to your Google Calendar, or integrate with openHAB to control your entire house. Jasper is definitely a cool feature to add to your mirror — if you’re up for the task!
I wrote an exhaustive guide on how to install Jasper on your Pi. You can also see my completed Magic Mirror build here, which is a great read if you’re also into woodworking.
Build a Voice-Controlled DIY Raspberry Pi Smart Mirror with Jasper
Questions? Problems?
The Raspberry Pi can be a complicated beast. Post below and I’ll do my best to help you out!