
Set Up Work Email Android
1
Open the add account screen
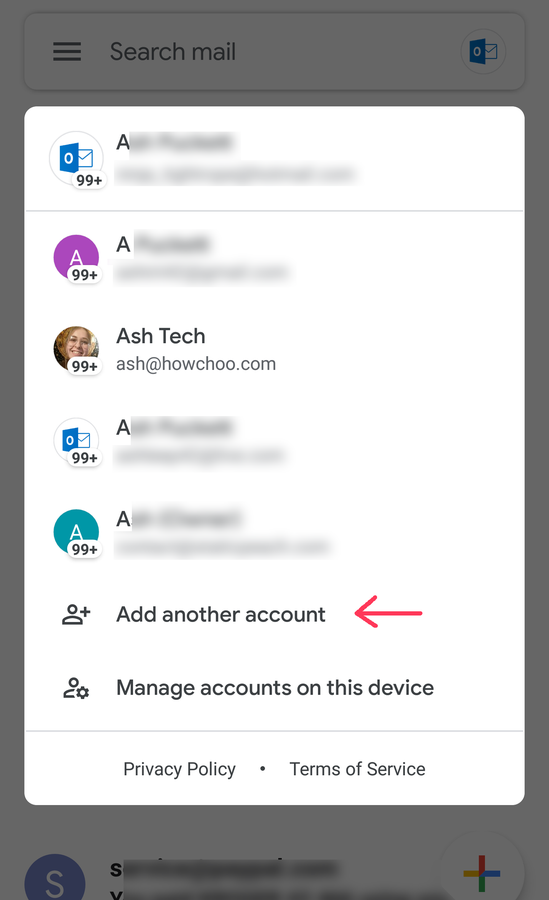
- Open the Gmail app.
- Select your profile photo in the top-right corner.
- Choose Add another account.
2
Choose the account type
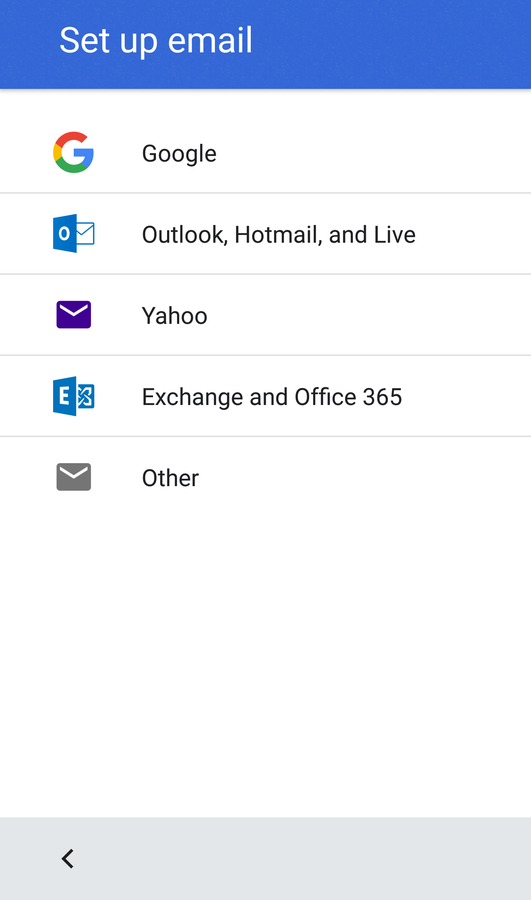
@outlook.com@live.com@hotmail.comOther3
Add the account details
Supported email providers
Other email providers
Other- Email protocol (IMAP or POP3)
- Incoming server address
- Outgoing server address
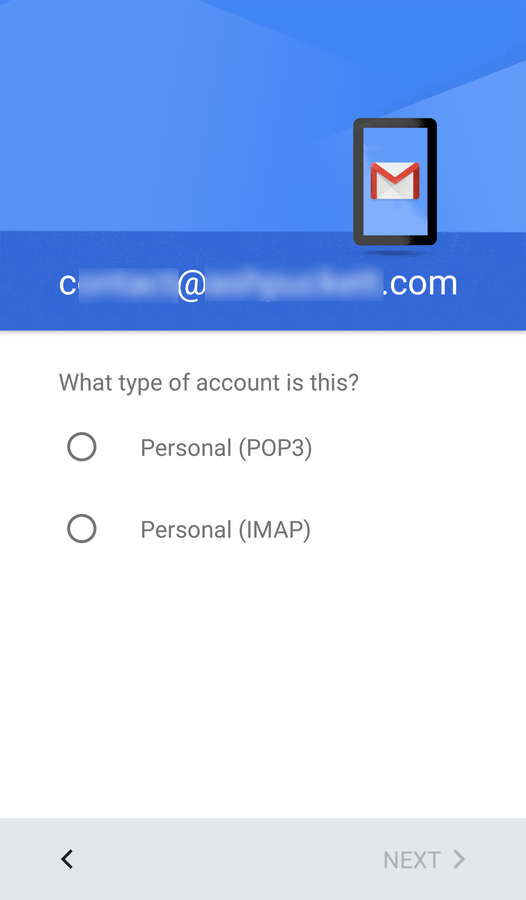
- Enter your email address, and choose Next.
- You will be prompted to confirm if the account is POP3 or IMAP. Tap Next.
- Enter the password associated with the email account. Tap Next.
- Confirm the incoming server address for your work email. Tap Next.
- Enter the outgoing server address for your work email. IT support should have this address, as well.
- Tap next and confirm the notification/sync settings for the email account.
4
How to switch between inboxes
- Tap your profile photo in the top-right corner.
- Choose an account to switch to.
5
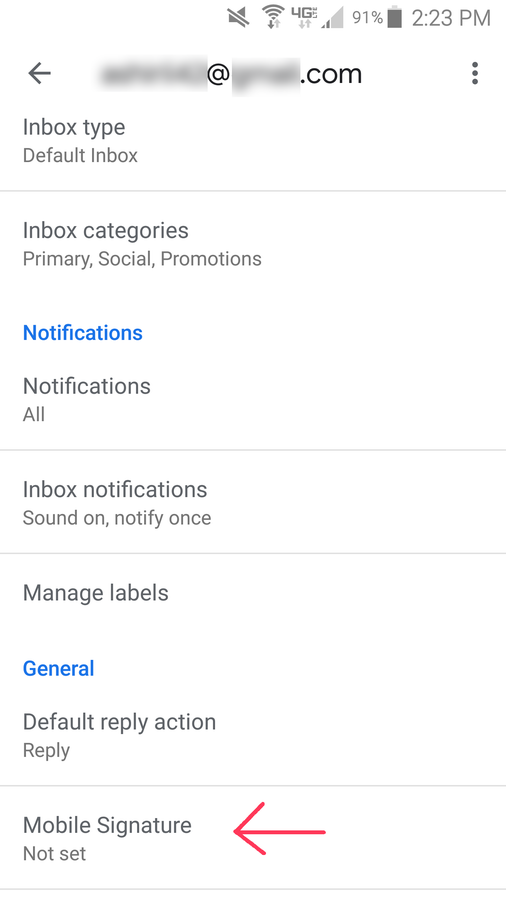
How to add a signature
- Open Gmail.
- Open the Main Menu.
- Choose Settings.
- Select your account, and go to Signature settings.
- Set Mobile Signature to on.
- Create a custom mobile signature to use with the account.
- Press the back button to save the changes.
6
Troubleshooting
How to Reset Network Settings on Android devices